After publishing several ebooks, I have a process that makes the relatively tedious exercise of formatting a document for publication into a repeatable set of steps that helps me generate ebooks quickly and without formatting mistakes. Until today, that process has lived in my head or in scattered to-do lists. I hope this documentation helps other independent authors in their quest to create beautiful books.
Delivering readers a document with professional-level formatting is essential for earning their trust and making them feel like they have spent their money well. If your ebook is well-formatted, it is easier to believe that it is also well-researched, comprehensively edited, and written with care. These first impressions inform how receptive your brand-new reader will be to your ideas.
This guide is written for the MacOS operating system and requires Microsoft Word. If you don't have and don't want to develop basic familiarity with Markdown and the Terminal, you can write your book in Microsoft Word directly and then start at Stage 2.
Stage 1: Writing in Markdown
I write books in Markdown because it works well with my brain. I personally use VSCode but any markdown editor works. I like Markdown because it gives just the right amount of structure to organize ideas early but doesn't weigh me down with unnecessary formatting decisions while I am drafting. Also, a few key pieces of syntax translate well to file formats used later in the process.
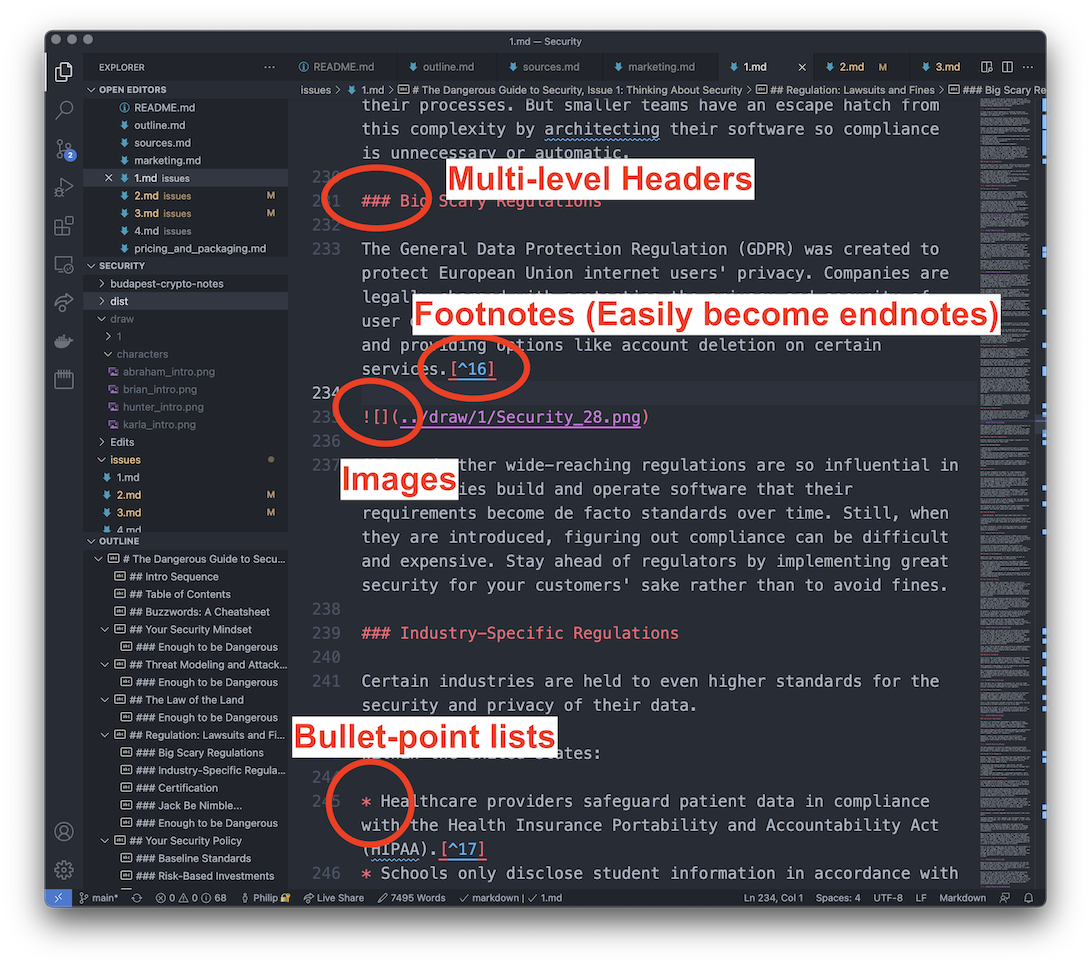
While writing make sure to use the following bits of syntax:
- First-, second-, and third-level headers. These help me organize my thoughts into chapters, sections, and sub-sections, making the book easier for readers to consume in chunks. Plus, these headers will help us generate a table of contents later.
- Footnotes let me give readers additional context and cite my sources. Don't worry about footnote numerical order, just throw everything in the bottom of the document and Microsoft Word will sort it out for you.
- Bulleted lists break up blocks of text and will automatically be formatted correctly in Word.
- Hyperlinks and image inserts to insert relevant additional material.
This limited vocabulary of formatting tools lets me focus on text while drafting while also setting me up for success while formatting. Plus, I can put markdown in version control which gives me more security in the revision process, allowing me to experiment and undo changes.
Intermediary: Pandoc Markdown to Word Conversion
Once the text in the markdown document relatively finalized (but by necessity before the final proofread as that happens on a fully formatted document), it is time to shift to Microsoft Word to format the document for publication.
To convert a markdown file to a .docx, I use pandoc (installation instructions), an open-source file conversion tool. I haven't had wonderful luck generating satisfactory PDFs directly from Markdown with pandoc, but it does a great job making a basic Microsoft Word document.

The invocation I use is pandoc file.md -o file.docx, nice and simple. Make sure you run this command from an appropriate directory such that the paths to images in your markdown file are correct.
Stage 2: Formatting in Microsoft Word
This is the main part of the process. The design decisions vary slightly from book to book but the overall approach is consistent.
Font
Microsoft Word pro tip: Always use the styles pane to make document-wide style changes. The style pane gives you access to the underlying system that controls how the document looks. For software developers familiar with CSS, these styles follow a similar cascading inheritance structure, where more specific styles override more general ones.
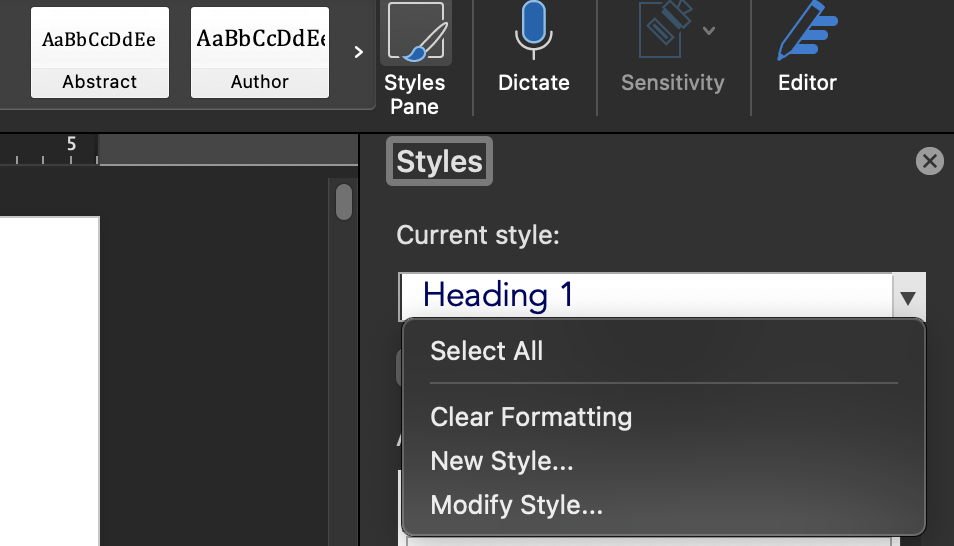
There are four styles we need to set: a general body text and three levels of headers. The most important choice here is font:
- A readable 12-point serif font is great for the body.
- A san serif font at 18-, 16-, and 14-point works great for setting headers apart.
- Body text should be black, headers might look good in a dark blue or grey.
- Page numbers and other incidental text can be set to either font according to your preference.
- Set font spacing at 1.15 to give the dense look of a book while improving readability.
I choose Georgia for my body text and Avenir in dark blue (hex: #000063) for my headers.
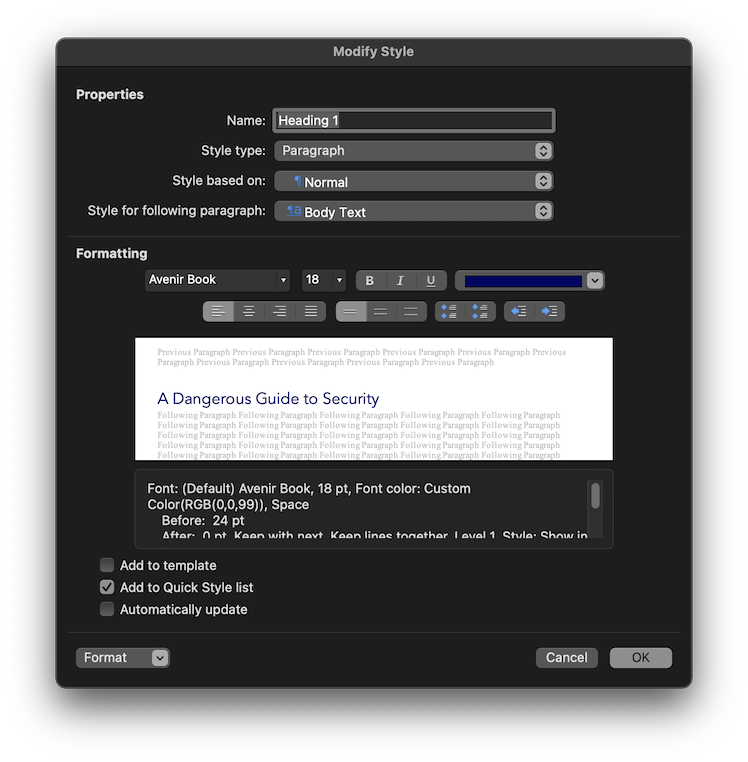
Use the style pane to set font size and style for each text type and it will apply uniformly across the document.
Page Size and Margins
By default, my Microsoft Word wants to use US letter pages, which are 8.5 by 11 inches, with one-inch margins. This is a sensible default for essays and printed materials, but the width is too long for a book. Thinking about printing books, most are not as large as a piece of printer paper. Trade paperbacks are usually 5 by 8 inches to prevent readers from having to move their eyes too much horizontally when reading.
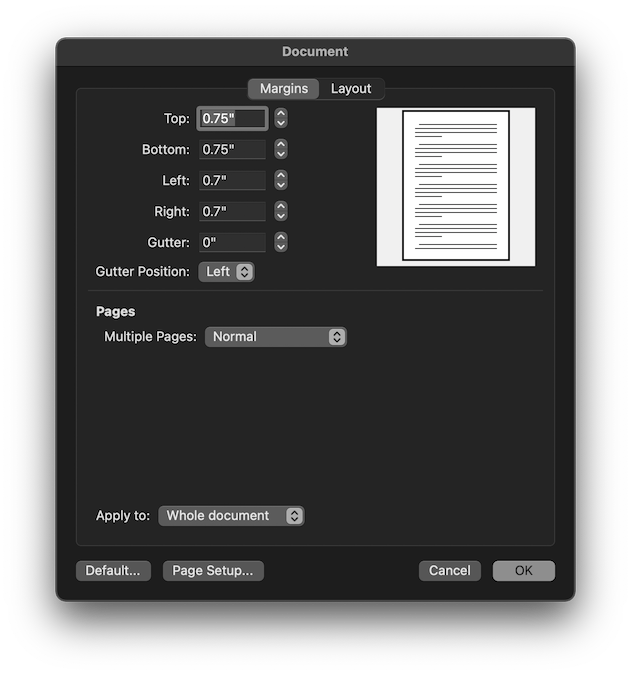
Digitally, the same principle applies (which is why websites limit the amount of text per line). So I set my books to use an A5 page size, which is 5.83 by 8.25 inches. You can set this with the Format > Document option:
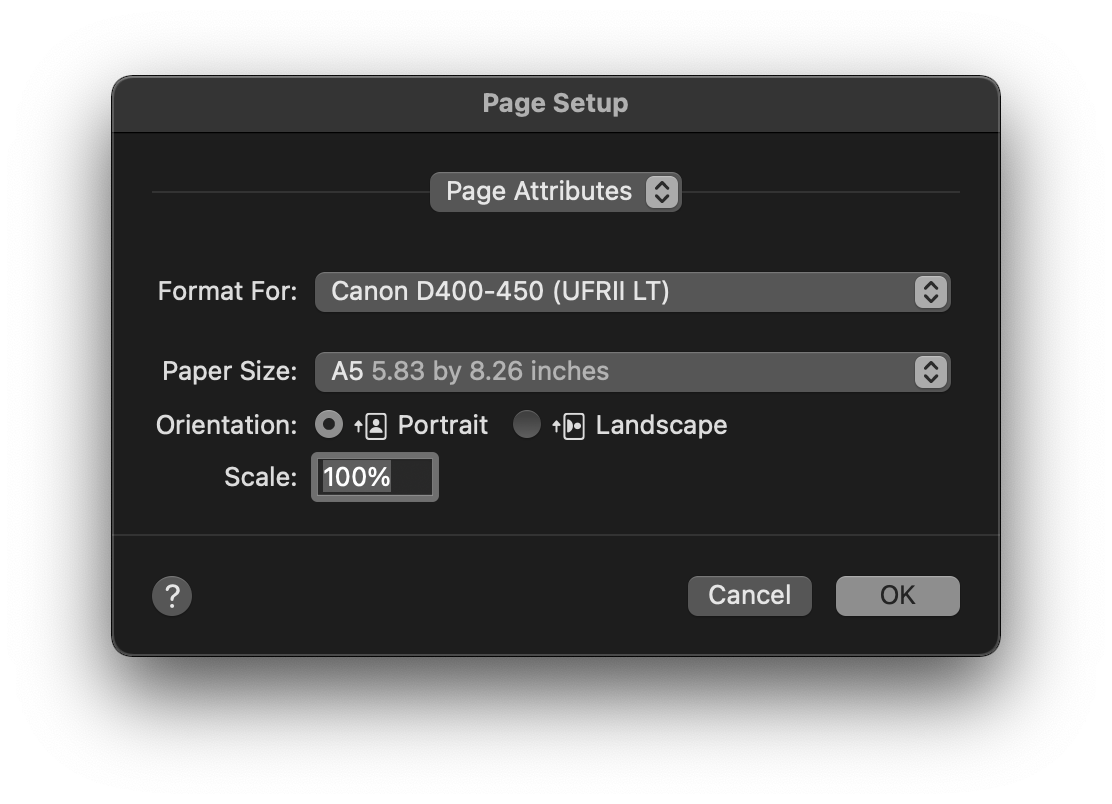
However, with this new page size, the margins are too big. So I scale them proportionately with .75 inch top and bottom margins and .7 inch left and right margins.
As a bonus, this increases the page count of your ebook by about sixty percent, making it a closer proxy to page count in print books.
Page Numbers
Add page numbers to make it easier for readers to tell their friends about the super awesome idea on page 17. Use Microsoft Word's Insert > Page Numbers and set them to be in the lower-right corner.

Footnotes and Endnotes
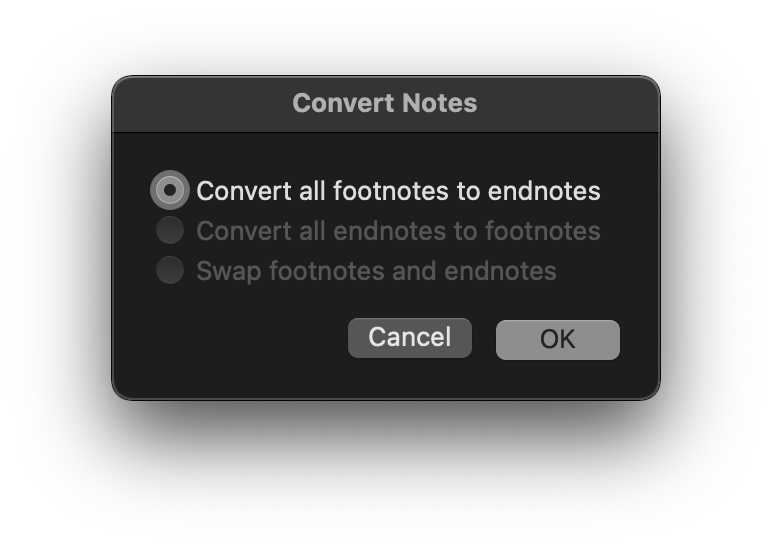
If you have footnotes in Markdown, Microsoft Word will automatically re-generate them with sequential numbering in the document. For Dangerous Guides, I use endnotes instead of footnotes. Fortunately, it is easy to convert them automatically. Use Insert > Footnote, then click "convert." You'll see an option to convert all footnotes to endnotes. Accept it, then cancel the footnote you were going to create. Now your footnotes are all endnotes!
Images
Images require the most manual formatting in Dangerous Guides because there are so many of them and they are not uniform. Do images from the top of the document to the bottom because placing them carefully helps avoid unsightly gaps where half a page is blank because of an overflowing image.
Every image is already in the document but they are probably the wrong size after all of the document-level formatting. For full-width images, just adjust the width by right-clicking on it and selecting "Size and Position." Set its width to 4.83 inches. If the resultant length is about as long as a page or longer, it will be replaced with a full-width version in stage 3, so just put it in an otherwise empty page using page breaks.
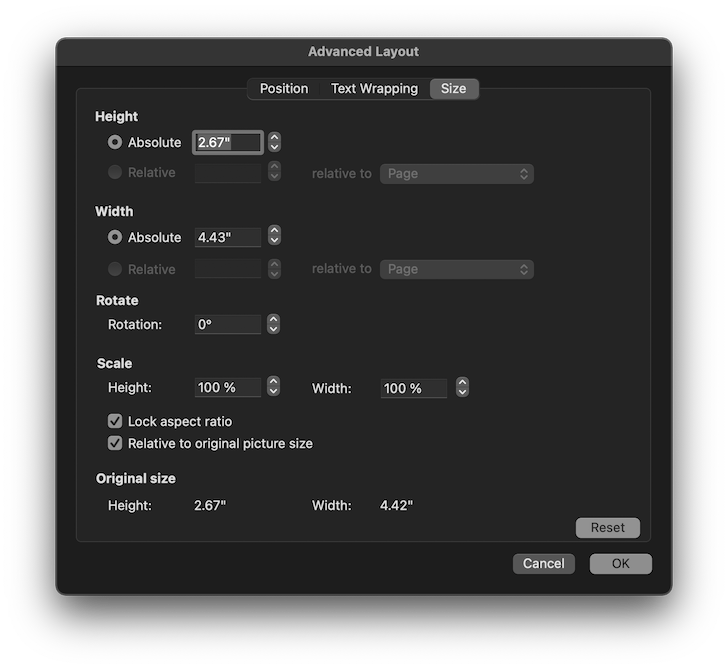
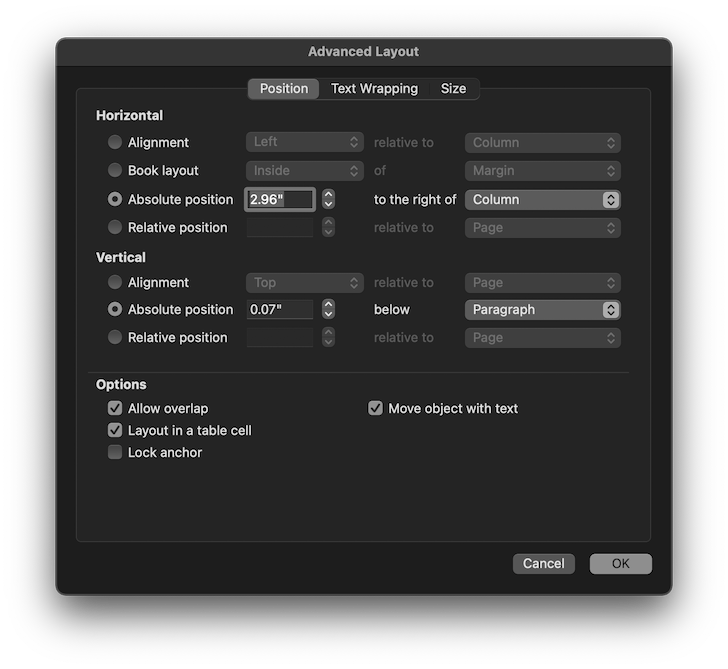
Inline images are a little trickier. First you want to set the size as appropriate (using the same panel) and configure text wrap:
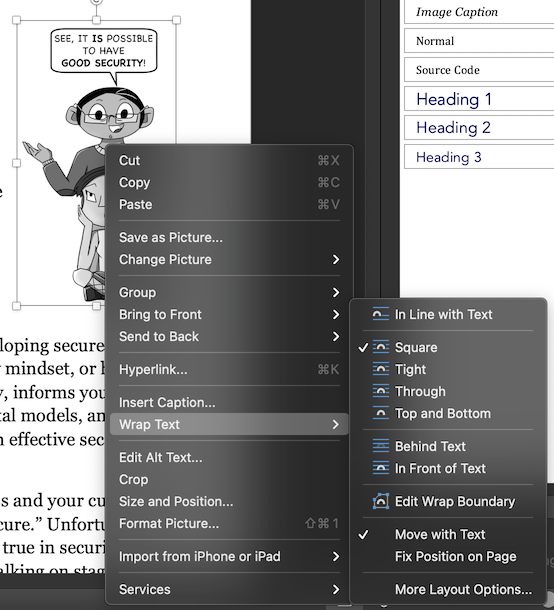
Then, position it with the position tab so it is in the desired place on the page and is right up against a margin without overflowing into it.
Images are where the most personal preference and approximation comes into play. Full-width images might have to shrink by a quarter-inch to fit in a page, or inline images might need an off-line position to mesh appropriately with a bulleted list. Use your design eye and best judgement.
Table of Contents
The final step is creating a table of contents. In a new page, copy in all section-level titles in body font and remove spacing in between paragraphs of the same style to compress them.
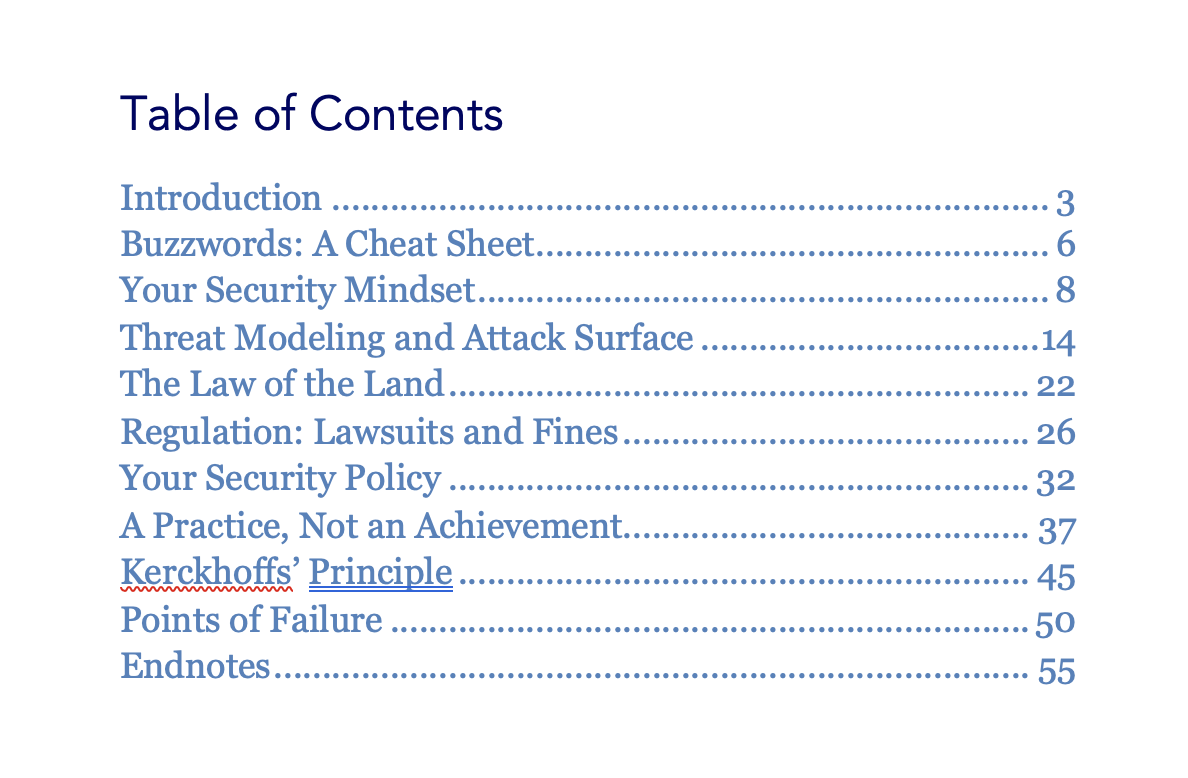
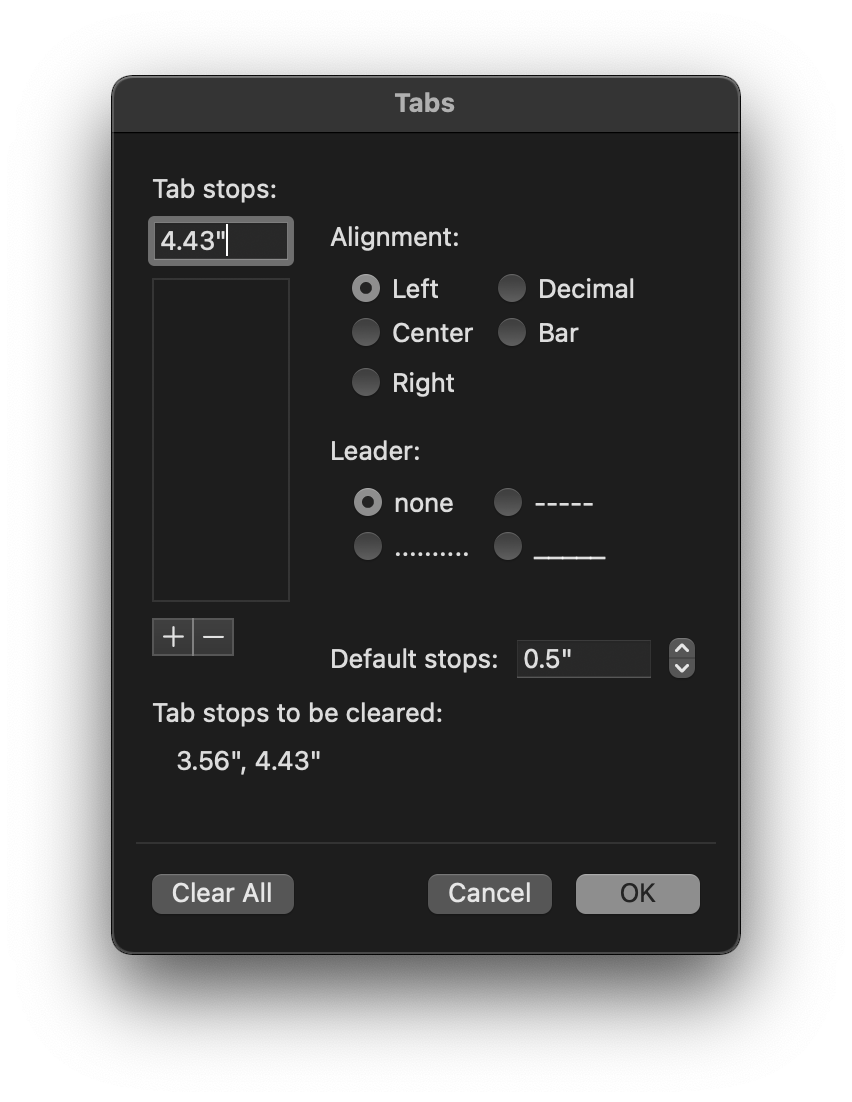
Making the dots to the right-aligned page numbers is a bit finnicky and you have to do it individually for each line by making a special tab. Double-click the ruler at the top of the page to create a tab, then click the tab once to raise the menu and set the options as seen in this screenshot:
Then, highlight your entire new line and use command-K to make a hyperlink. Microsoft Word will give you a tab of every header in the document to choose from to link to.
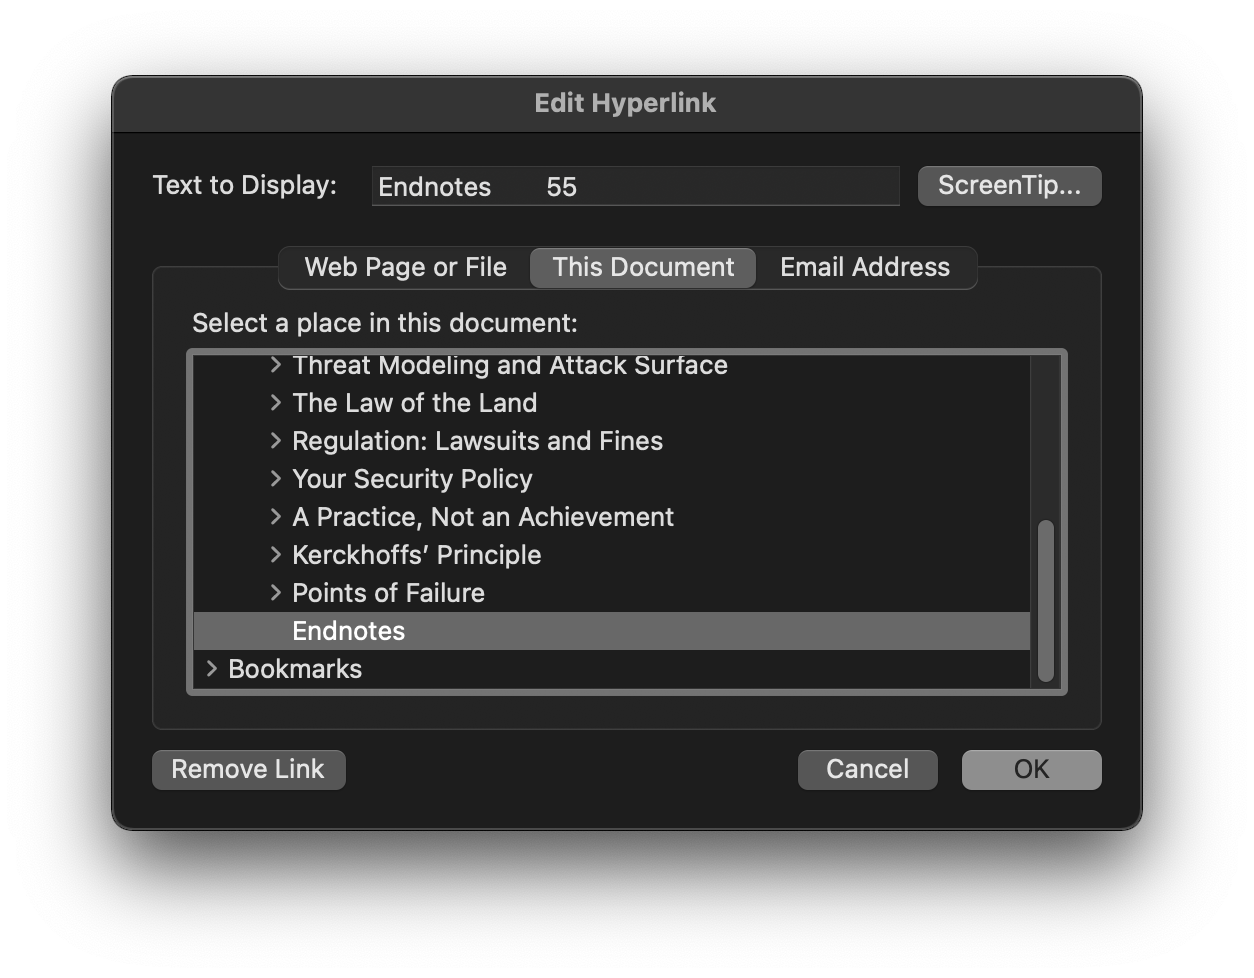
Don't worry if you inadvertently click a link and turn it purple, it will be blue in the final export.
Intermediary: Microsoft Word to PDF Export
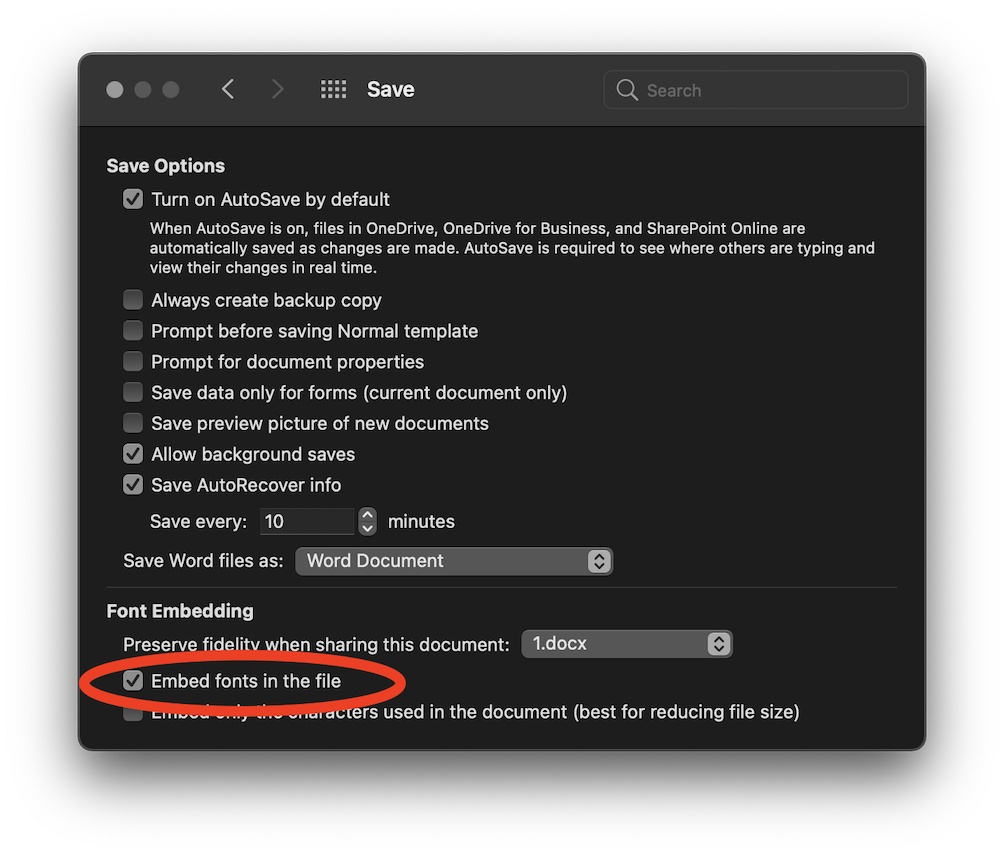
When exporting to PDF, you first have to go to Preferences > Save and select the "embed fonts" option or your carefully chosen fonts will not be included in the final document, reverting to system fonts.
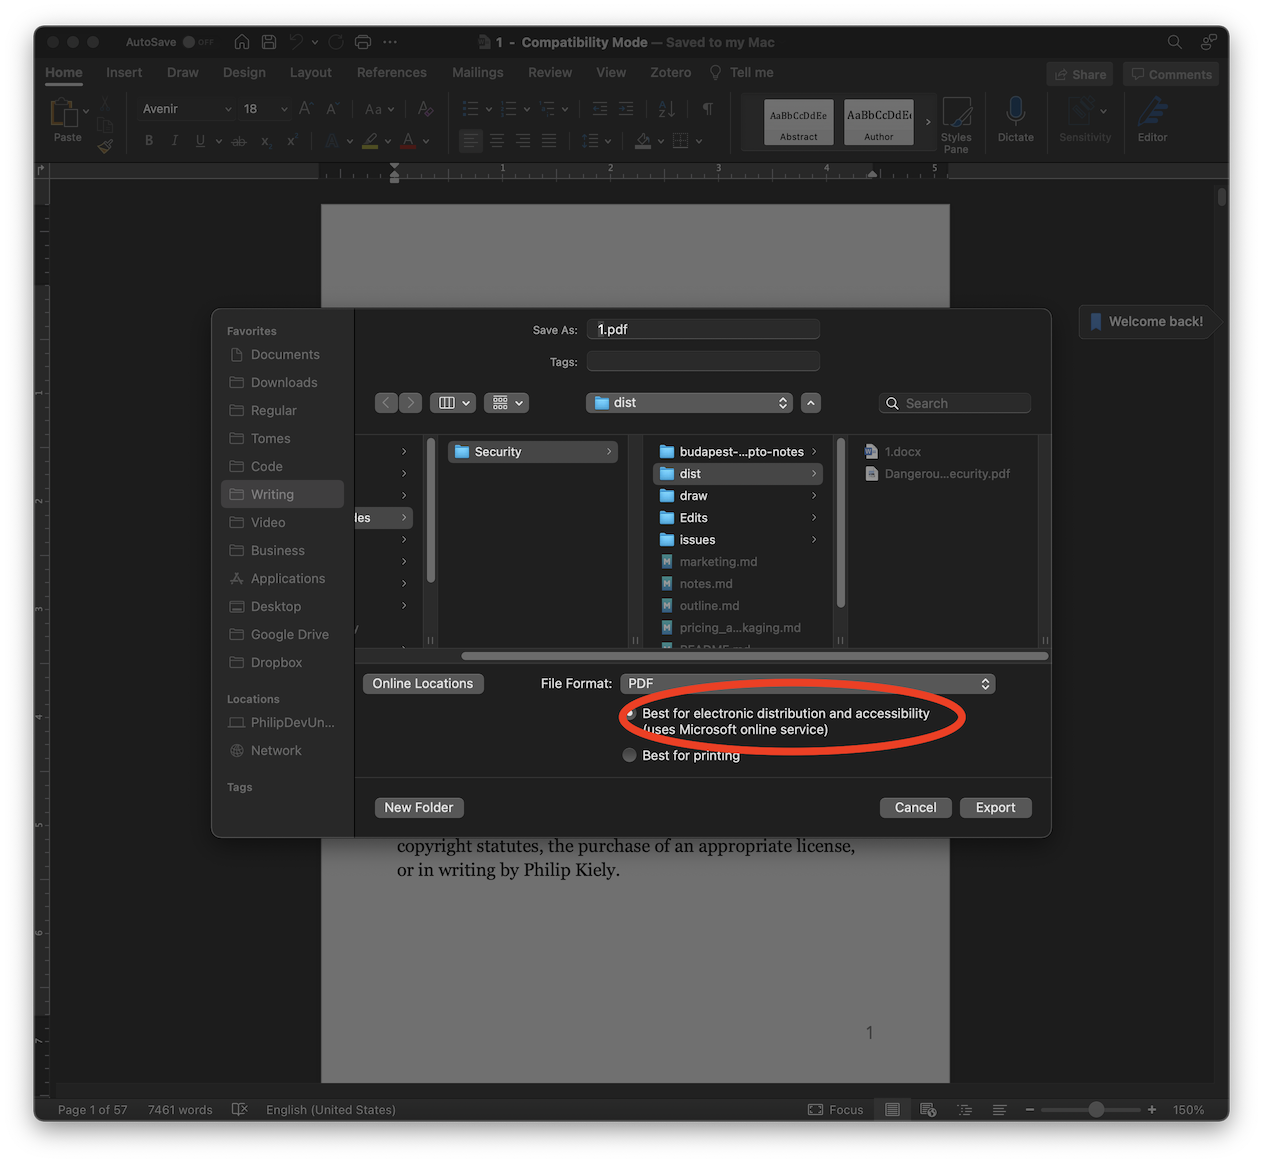
With fonts embedded, chose Save As > PDF to create the PDF document. After setting the desired folder and file name, make sure the "Best for Electronic Distribution" option is selected so your table of contents, links, and endnotes all still work.
Stage 3: Final Assembly in Preview
We have the PDF! But we're not quite done. We need to attach the cover and any other full-page images.
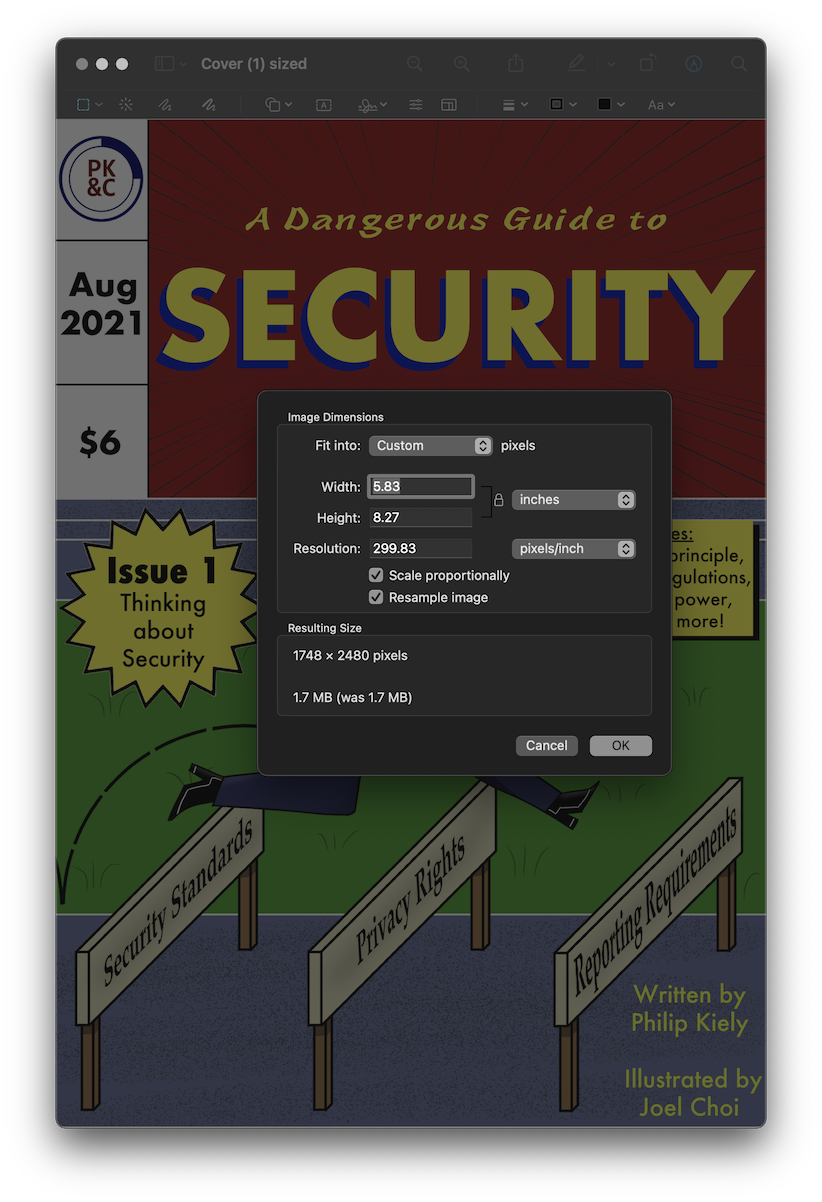
First, take the high-resolution cover PNG from the designer and open it in Preview. Use Tools > Adjust Size to re-size it to be 5.83 inches wide, same as the PDF pages. Length doesn't matter, it can be longer or shorter without issue. When re-sizing the PNG, make sure to not resample the image, keep the original resolution so it does not get fuzzy.
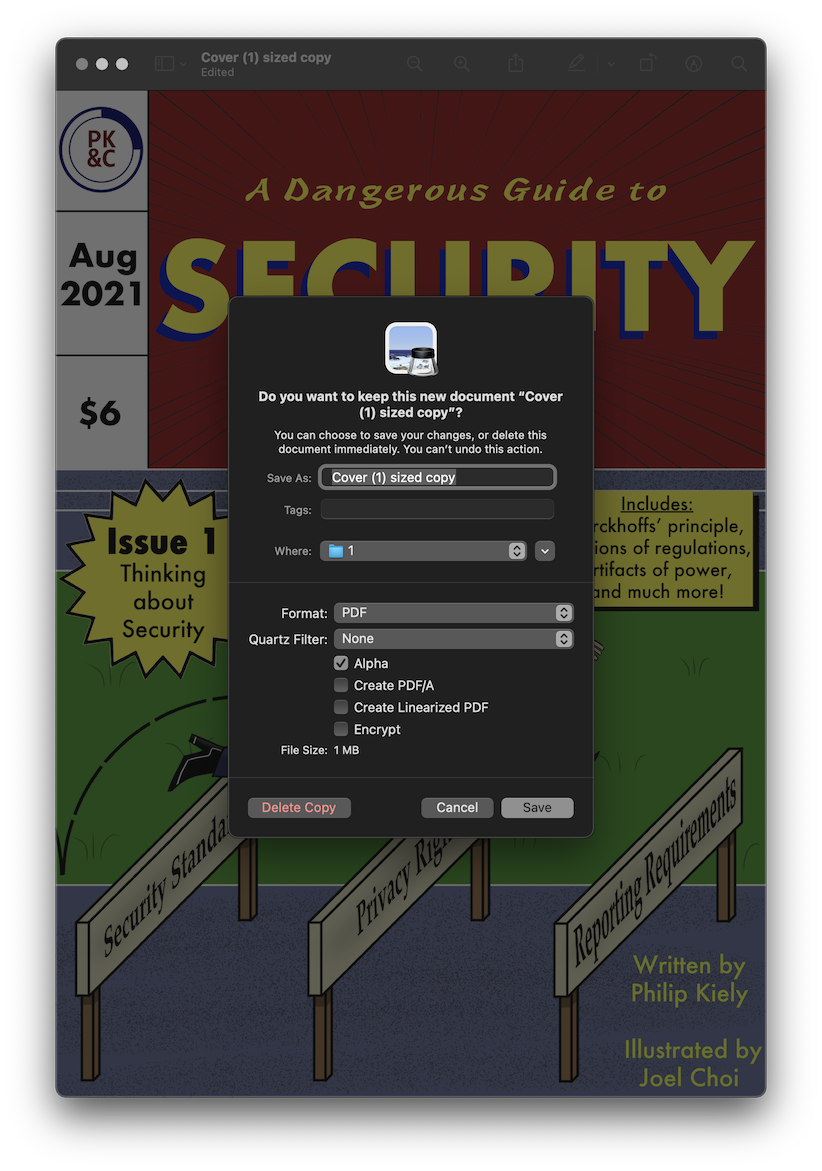
Then, use shift-command-S to make a copy. Click the red "close file" circle in the top left to prompt a save menu, and change the format to PDF.
Repeat this process for any full-width comics or other images to be inserted into the final document.
Open the PDF exported from Microsoft Word and drag the new PDF cover from finder into the left-hand panel with the page previews. This will insert it into the document. Save the newly concatenated PDF and repeat for any full-width comics.
Finally, look over the PDF and test all of the links in the table of contents and footnotes. Then, send it to the editor for a final proofread! At this point, the Microsoft Word file with formatting is the single source of truth and and changes should be applied there so that the formatting process doesn't need to be repeated. Don't forget to commit the word doc and PDF to version control, even though you can't inspect changes you may want to revert to this version in the future.
Bonus: Making an EPUB in Apple Pages
An EPUB is an open-source format that is supported by a wide variety of e-reader applications. For an independent author publishing digital books, making your book available as an EPUB as well as a PDF is a great way to increase readership by giving people the format they prefer. PK&C books like Writing for Software Developers and parts of Cold Email for Interesting People are available in EPUB and are popular in that format.
However, EPUB is something called a "reflowable layout" format. Unlike PDFs — which have fixed fonts, page sizes, and image positions — EPUBs let readers set their own font and font size and then automatically position images and break pages according to the screen size the file is being displayed on. Accordingly, the EPUB format is awesome for text-heavy books but for an entry in the Dangerous Guides series, with its emphasis on images and hybrid comic-book layout, it is not a good format.
While the Dangerous Guides are not available in EPUB, making the format outside the scope of this guide, I can offer a brief description of how I generate an EPUB.
Perhaps surprisingly, Microsoft Word does not have a native EPUB export option, but Apple Pages offers an excellent one. I follow the following steps:
- Open the Microsoft Word doc in Apple Pages and save it as a native pages file.
- Delete the page numbers and table of contents as the EPUB generation process will create those from the headers.
- Go through the EPUB export options, adding my name in the Author metadata field and using the PNG version of the cover from the earlier step as the book's cover.
Unfortunately, now whenever I make changes to the final text in the Microsoft Word version, which had become the single source of truth, I now have to change it in the Apple Pages version as well to update the EPUB. So, if fixing typos after publication, I need to fix them twice, adding a moment to the process. However, it is worth the extra effort because it is much less work than turning the Microsoft Word document or PDF into a nice-looking EPUB directly.