How I Format and Publish Ebooks
After publishing several ebooks, I have a process that makes the relatively tedious exercise of formatting a document for publication into a repeatable set of steps that helps me generate ebooks quickly and without formatting mistakes. Until today, that process has lived in my head or in scattered to-do lists. I hope this documentation helps other independent authors in their quest to create beautiful books.
Delivering readers a document with professional-level formatting is essential for earning their trust and making them feel like they have spent their money well. If your ebook is well-formatted, it is easier to believe that it is also well-researched, comprehensively edited, and written with care. These first impressions inform how receptive your brand-new reader will be to your ideas.
This guide is written for the MacOS operating system and requires Microsoft Word. If you don't have and don't want to develop basic familiarity with Markdown and the Terminal, you can write your book in Microsoft Word directly and then start at Stage 2.
Stage 1: Writing in Markdown
I write books in Markdown because it works well with my brain. I personally use VSCode but any markdown editor works. I like Markdown because it gives just the right amount of structure to organize ideas early but doesn't weigh me down with unnecessary formatting decisions while I am drafting. Also, a few key pieces of syntax translate well to file formats used later in the process.
While writing make sure to use the following bits of syntax:
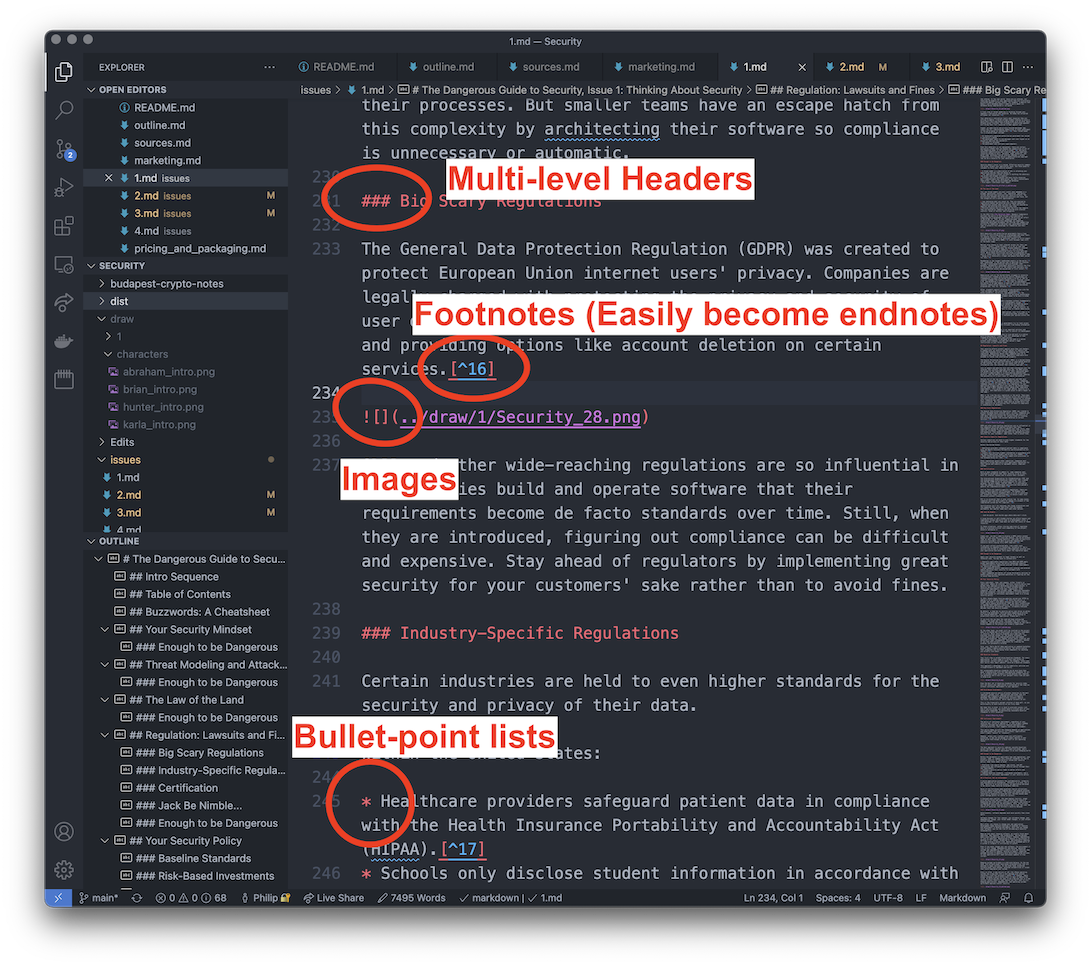
- First-, second-, and third-level headers. These help me organize my thoughts into chapters, sections, and sub-sections, making the book easier for readers to consume in chunks. Plus, these headers will help us generate a table of contents later.
- Footnotes let me give readers additional context and cite my sources. Don't worry about footnote numerical order, just throw everything in the bottom of the document and Microsoft Word will sort it out for you.
- Bulleted lists break up blocks of text and will automatically be formatted correctly in Word.
- Hyperlinks and image inserts to insert relevant additional material.
This limited vocabulary of formatting tools lets me focus on text while drafting while also setting me up for success while formatting. Plus, I can put markdown in version control which gives me more security in the revision process, allowing me to experiment and undo changes.
Intermediary: Pandoc Markdown to Word Conversion
Once the text in the markdown document relatively finalized (but by necessity before the final proofread as that happens on a fully formatted document), it is time to shift to Microsoft Word to format the document for publication.
To convert a markdown file to a .docx, I use pandoc (installation instructions), an open-source file conversion tool.
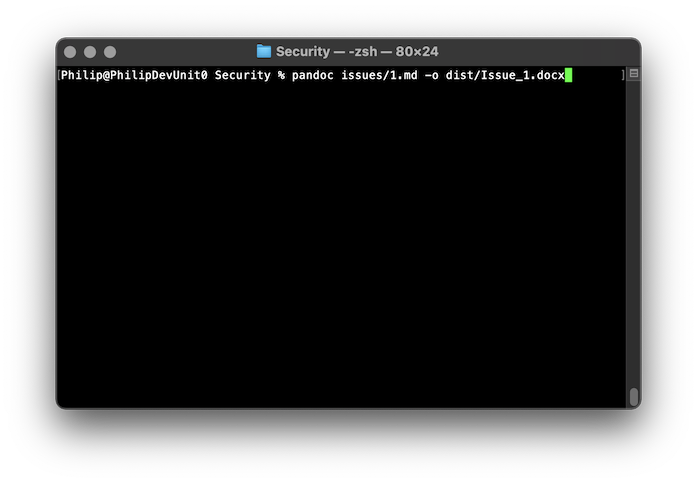
The invocation I use is pandoc file.md -o file.docx, nice and simple. Make sure you run this command from an appropriate directory such that the paths to images in your markdown file are correct.
Stage 2: Formatting in Microsoft Word
This is the main part of the process. The design decisions vary slightly from book to book but the overall approach is consistent.
Font
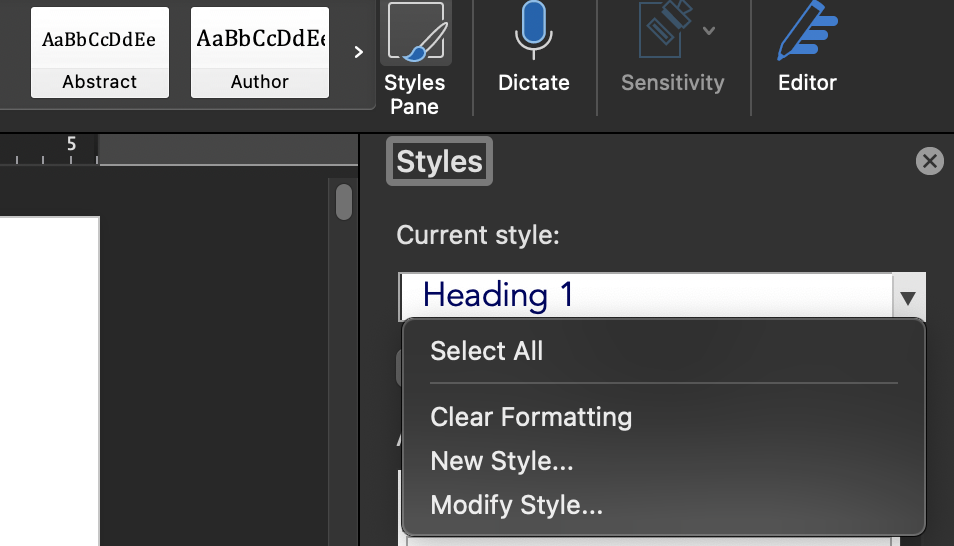
Microsoft Word pro tip: Always use the styles pane to make document-wide style changes. The style pane gives you access to the underlying system that controls how the document looks.
Page Size and Margins
By default, my Microsoft Word wants to use US letter pages. This is a sensible default for essays and printed materials, but the width is too long for a book. Digitally, the same principle applies (which is why websites limit the amount of text per line). So I set my books to use an A5 page size, which is 5.83 by 8.25 inches.
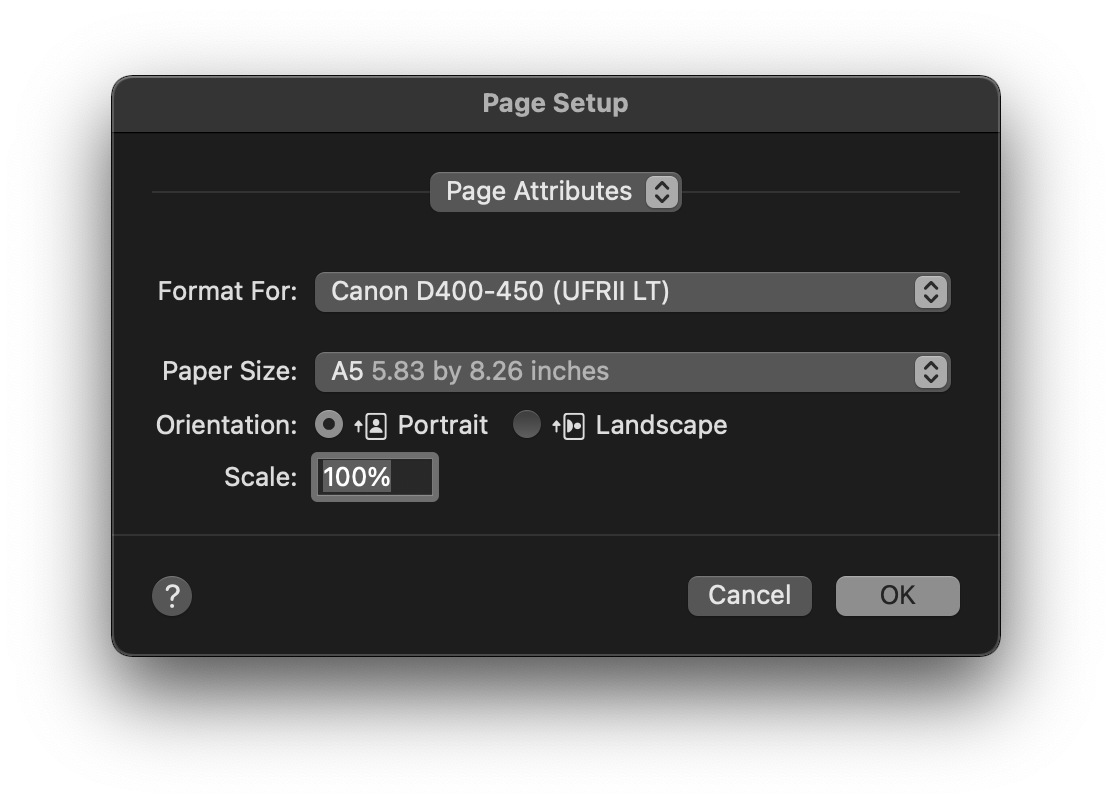
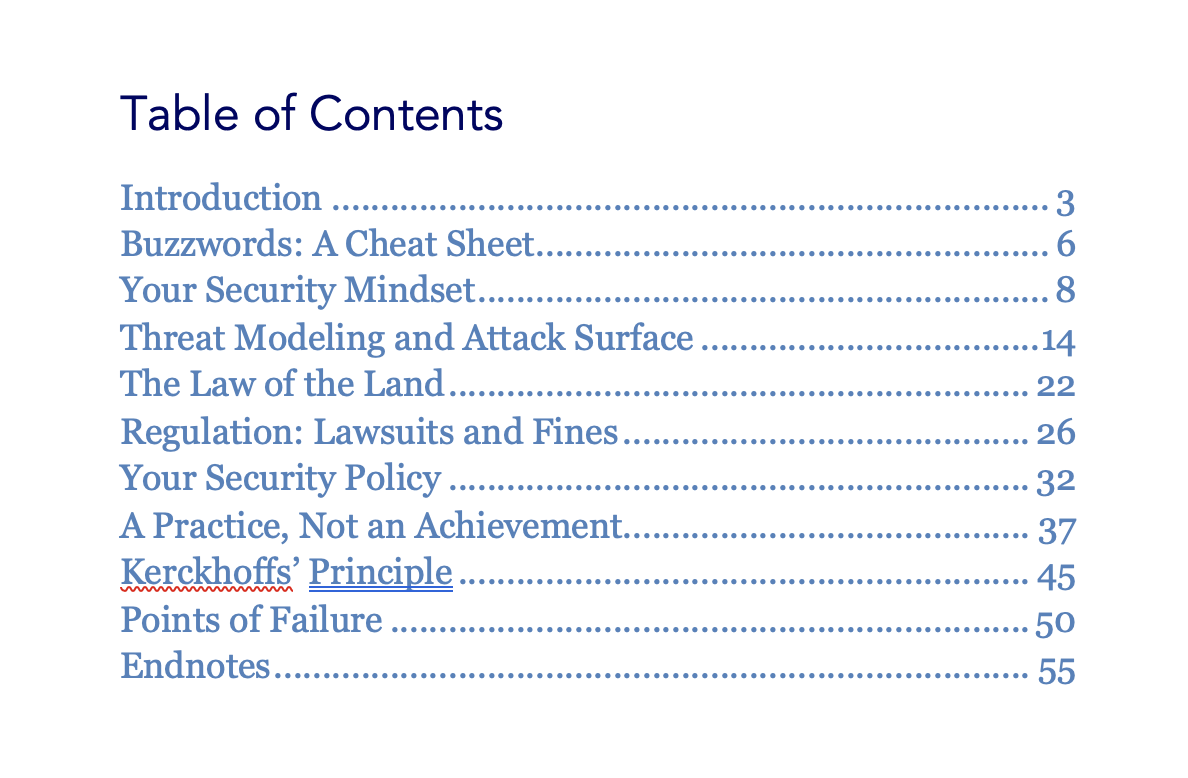
Table of Contents
The final step is creating a table of contents. In a new page, copy in all section-level titles in body font and remove spacing in between paragraphs of the same style to compress them.
Stage 3: Final Assembly in Preview
We have the PDF! But we're not quite done. We need to attach the cover and any other full-page images.
First, take the high-resolution cover PNG from the designer and open it in Preview. Use Tools > Adjust Size to re-size it to be 5.83 inches wide, same as the PDF pages.
Finally, look over the PDF and test all of the links in the table of contents and footnotes. Then, send it to the editor for a final proofread!